Today I'd like to share some fun, slightly unconventional techniques I used to make the Robo Maestro robot in Blender. I wanted shapes that are both smoothly curved and tight industrial. Hard surface modelling! I think it turned out well, so let's have a look at how it was made!
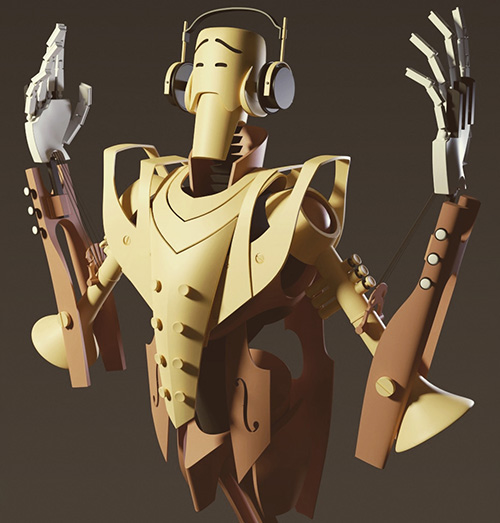
The concept art I was going by is this rough sketch by Robin Keijzer, creator of the awesome point and click adventure Space Rescue (available on Steam, NSFW!). As you can see, all shapes are a combination of curves, straight lines and hard edges.

Subdivision modelling is a great way of making these kinds of curves, but it's a bit cumbersome when you need hard edges and corners as well. The tip you usually see for getting hard edges is to add supporting geometry: extra vertices around hard edges.

However, the more vertices you have, the harder it is to change the shapes: the model becomes unwieldy. Also, the fewer vertices, the smoother the curves you get. So I really really wanted to have as few vertices in the base model as possible for the best smooth curves.
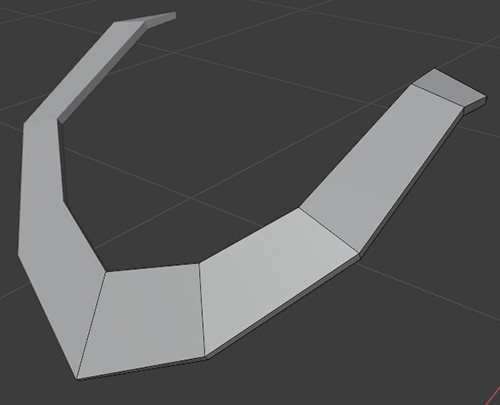
Here Blender comes to the rescue! It has a wonderful feature called "creases" that lets you mark edges that should not be smoothed by the subdivision modifier. This lets us combine hard edges and smooth curves with very few vertices in the base mesh. Very cool, very handy!

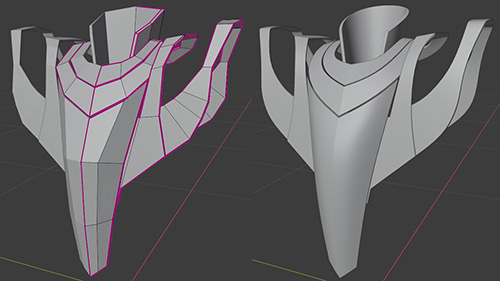
Here you can see just how few polygons the base mesh for the Robo Maestro has, and how smooth the curves are that that results in.
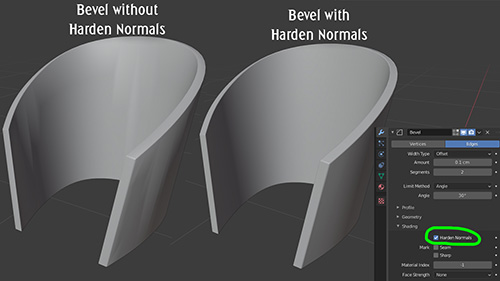
However, 100% hard edges feels cheap and fake 3D. For high quality models, we want to slightly bevel the hard edges. Luckily, Blender can also provide this: we can simply add a Bevel modifier to do this automatically.
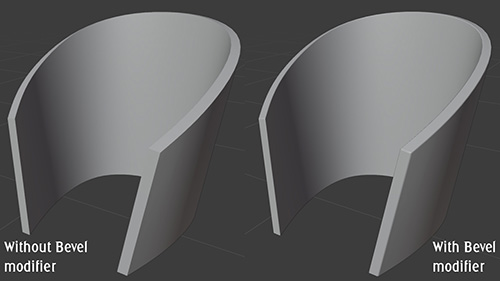
The bevel modifier by default is either one hard edge (still not perfect) or more edges. Adding more edges makes Auto Smooth kick in, which makes us lose a lot of the tightness. The "harden normals" option fixes this (by not using interpolated normals on the bevel edge).
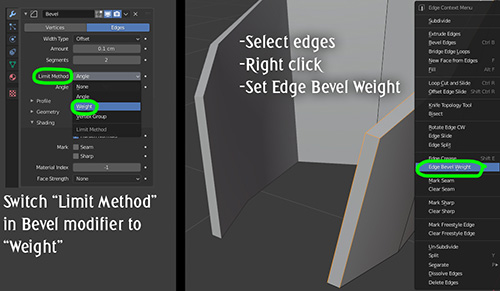
The bevel modifier automatically looks for edges to smooth, but sometimes it gets it wrong. In such cases switch the "limit method" to "weight". Now we can mark edges that need a bevel in our base mesh, and we can even mark per edge how wide the bevel should be. Neat!
Being able to mark edges and vertices with special features that are used elsewhere is one of my favourite features in Blender. Besides "crease" (for subdivisions) and "bevel weight" there's also "seam" (for automatic UV mapping) and "sharp" (for smooth shading).
Combining these techniques I was able to create the Robo Maestro pretty quickly and still remain flexible until the last stages of modelling: Robin had some feedback on the shapes and I was able to change them very quickly because the base meshes have so few vertices.

Finally, if you were wondering what this model is for: Robo Maestro is a procedural music toy that I'm developing for Steam. He even plays the actual notes with his fingers! Here's a little trailer that shows the concept. Wishlist Robo Maestro now on Steam!